Back to the Future: 3D Printed Flux Capacitor
With 2015 now well and truly here, a lot of people are reminding us that it is also the year that Marty McFly of Back to the Future Part II is due to arrive.
Although there are no flying cars or hover boards available yet, I thought we'd have a go at recreating the iconic Flux Capacitor as featured in the DeLorean time machine.
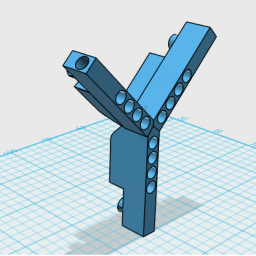
The version I have created can have LEDs added to create the pulsing animation, similar to that seen in the film. To allow for this, there are 4 holes in each segment of the transparent "Y" part to take standard 5mm LED's. The pulsing animation is achieved with an Arduino Nano microcontroller.
I will follow up with the Arduino side of things soon for those interested in the electrical side of this. Anyone familiar with programming an Arduino should be able to manage this fairly easily.
The finished unit's dimensions are 90mm x 55mm x 108mm. The "Y"-shaped segment was printed using "natural" plastic on a 40% fill. Silver plastic was used for the case. Gold, red, and yellow plastic for the three bits that clip onto the "Y" section. While inside the case, I cut a suitable-sized piece of Perspex for a bit more detail. It looks great without the perspex too.
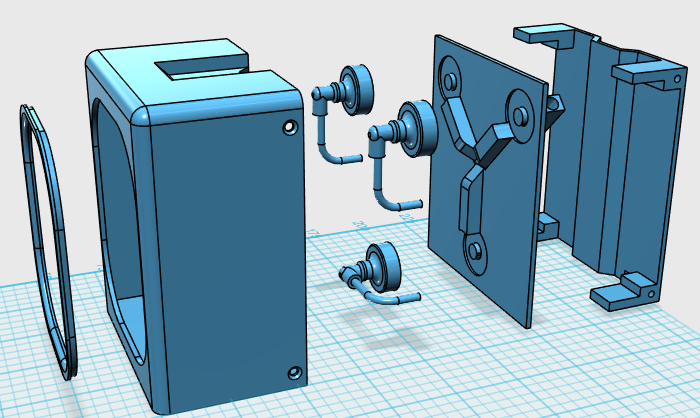
Here is the Flux capacitor constructed and working.
As usual, all the STL files are provided below, so download and create your own Flux Capacitor. Enjoy!
File Download
Click the link below to download the file(s):
Flux Capicitor: flux.zip (705.07kb)
Disclaimer: All files are provided as-is without warranty of any kind.
Submit a Comment
Comments
wagnerAug 06, 2019 01:30