Automatic Supports VS Manual Supports
While browsing Thingiverse recently for movie-related 3D objects to print, I came across this cool reproduction of the Idol from Indiana Jones and Raiders of the Lost Ark by user Nowhereman999.
Without going into the movie in detail, this Golden Idol is what Indy finds at the start of the movie. After navigating a series of clever traps, he gets the Idol and has to escape without being squashed by a giant boulder.

As with all models of this complexity, you will inevitably need to use supports when printing due to the overhanging parts of the model. I use Makerware to do all my 3D printing and usually enable the automatic supports.
The problem with using supports is the need to sand them off when the print is complete; otherwise, you get horrible rough marks on your print.
Due to the size of the Idol (over 200mm tall), it would need to be printed on its side (I wanted it to be scale) as my Makerbot Replicator 2 has a maximum height limit of about 150mm. This poses an interesting challenge for the supports that will be needed to keep the idol in place during printing. Here is a preview of the print in Makerware with the automatic support enabled:
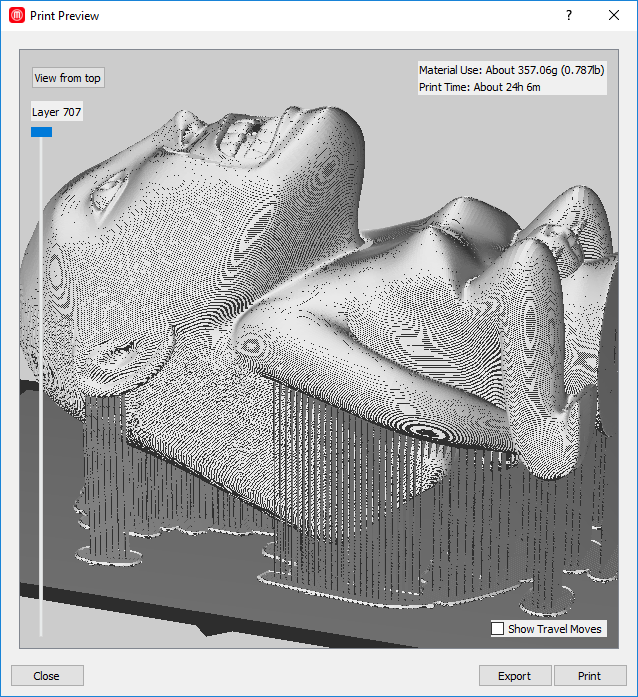
As you can see, it needs a lot of support when printing out the idol on its back. Not only are all those supports using up plastic, they are also adding extra time to the print. Surely we can turn off the automatic supports and create our own supports that are optimized for this particular model? This is exactly what I intend to do.
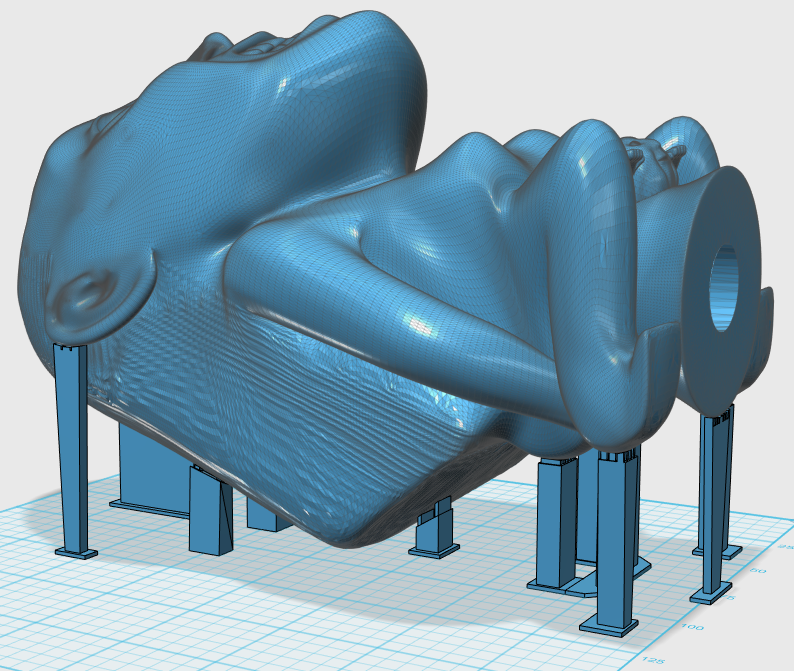
As this print will take a substantial amount of time to complete, we want to ensure the supports are in the best positions and are strong enough. When I do manual supports, I tend to just create small rectangles about 1mm thick and position them from the bottom to the area of contact on the model. The support doesn't intersect with the model; it stops about 0.3mm before the model. This ensures the model sits on the support rather than the support becoming part of the model, and it is easier to remove at the end. When there are lots of supports near each other, we need to merge them together, so we end up with a single support that branches off into smaller supports as it nears the model.
Some areas of the model do not need any support at all. For example, the arms in the automatic supports preview have supports running up both arms. As we are printing at 0.2mm layer height, we don't need any supports on the arms.
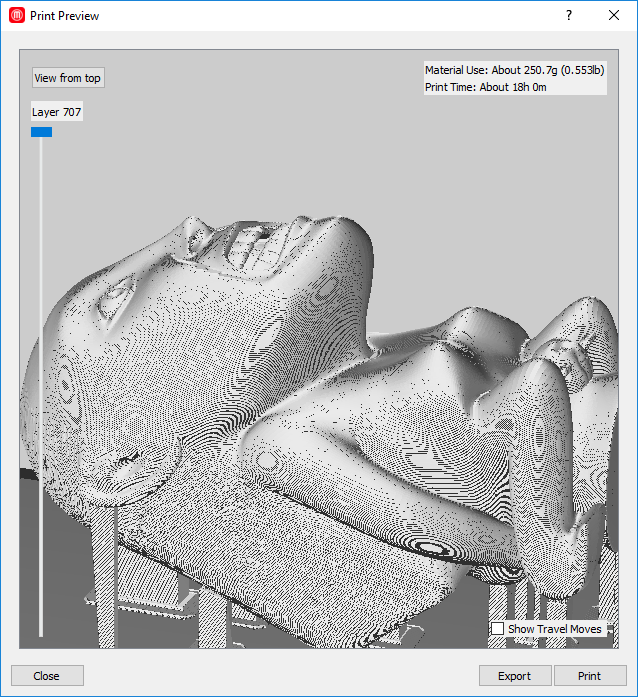
Comparing the previews, the design with the manual supports saves both plastic (250g vs. 357g) and time (18 hours vs. 24 hours). Although the previews are never 100% accurate, it is clear we will save a significant amount of time by designing our own supports (and we will save some plastic too, which is always a bonus!).

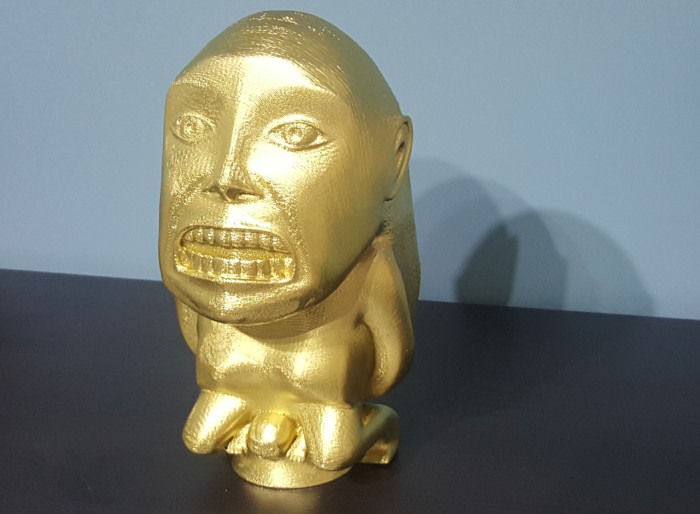
After starting the print and waiting 16.5 hours later, we have the final printed model. The supports did their job, and the model stayed put throughout the print. Thanks to the reduced number of supports, they are easy to remove with the minimum amount of sanding to remove the rough areas where the support intersects with the model.
In the next article, I'll be looking at how to smooth out the prints to minimize the layering effect of 3D printers and hopefully make this Idol look even better.