Stop the Express Money Box
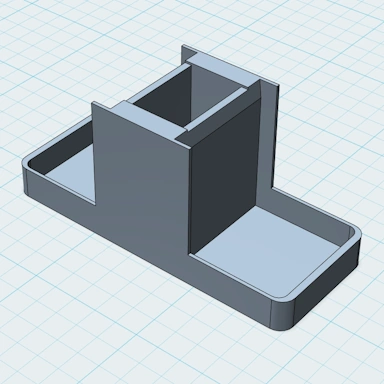
Following up on the Stop the Express 3D Picture we made recently, we will re-use the 3D models to create a decent-sized money box.
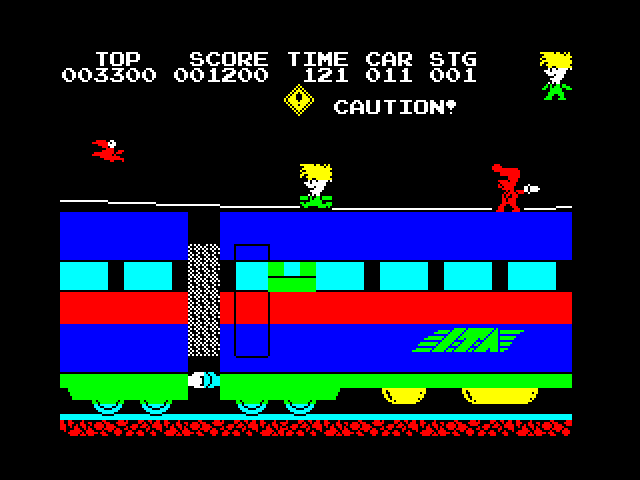
For those who aren't familiar with Stop the Express, here is a screenshot from the ZX Spectrum version. The money box we're creating is basically one of the train carriages from the game screenshot.
We'll be adjusting the scale so that 1 px = 1mm on the final print. This means the length of the main carriage model comes out at 240mm, which is within the maximum length the printer can handle.
As the train carriage in the game uses a number of different colors, we will have to plan and design all the pieces in such a way that we will be able to assemble them once everything is printed without any issues. The main carriage (green or blue) is a single 3D model. We will be printing that, starting with green plastic and swapping after about 14mm to blue plastic.
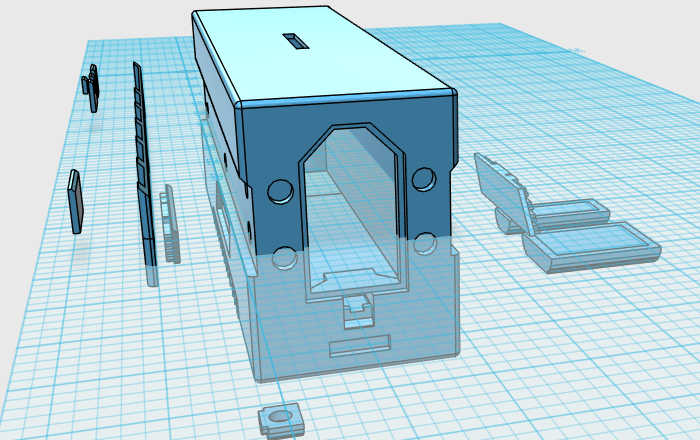
The red strip, black strip, Cyan windows, and logo are all separate 3D models created from the original ZX Spectrum screenshot. These will be printed individually in their respective colors and clipped or glued onto the main carriage model.
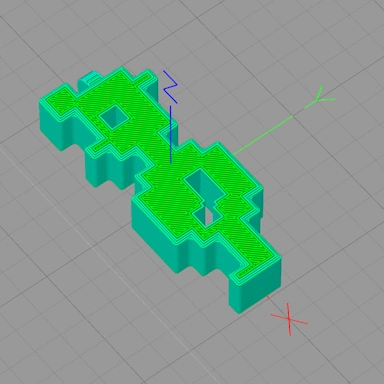
To avoid having to print with the Supports option on, we apply a Chamfer to the walls of any overhanging surfaces. This gives them a nice, gentle slant that the 3D printer can build without plastic dropping onto the build plate. I've marked up some of these walls in the design screenshot below:

The only supports needed are on the bottom of the main carriage model. For these, we've manually created supports, which are small, thin (0.5mm) strips that run the width of the carriage at 7mm intervals. This is plenty to enable the printer to build the base of the carriage without any drooping plastic!
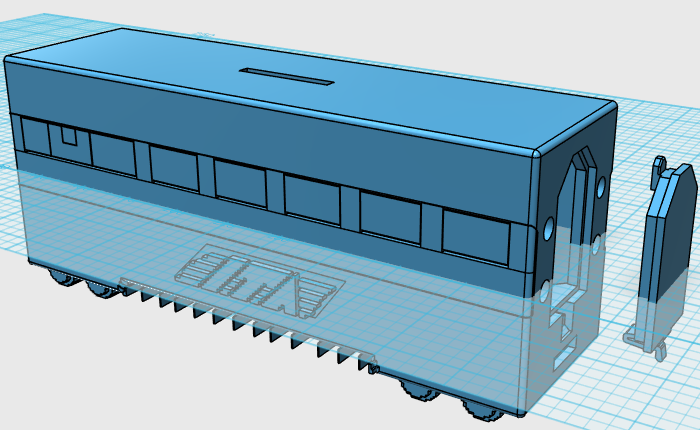
The top of the carriage has the necessary hole for the money to be inserted into. On the side is a decent-sized clip-on panel, giving us access to our hard cash when we need it! The design of the panel is based on a clip-on battery cover, which should work just fine on our carriage.
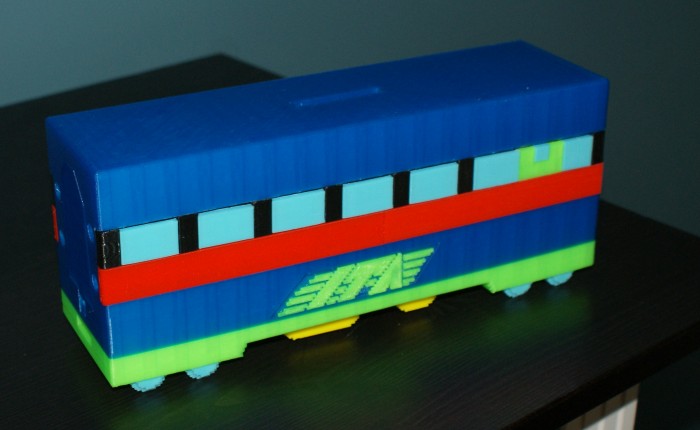
The print time for the main part was about 10 hours, so it's not one to make if you're in a rush. With all the additional items printed out and clipped or glued into place, the carriage money box is complete!
There are additional holes on either end to enable us to print multiple carriages and hook them together. Although for now, this has taken quite some time to create, print, and assemble. I'll stick with just the one!